
Making a flight booking on Trip.com couldn’t be simpler, regardless of whether you’re booking via the website or our app. We’ve streamlined the process to ensure you fly the way you want to fly, including different classes, amounts of baggage, prices, and locations. It’s all at your fingertips, so get booking today with the help of our in-depth guide below.
How to Book Flights on the Trip.com Website
1. Click on the homepage.
2. Ensure you are either signed in or create an account with Trip.com.
3. Before searching for your flights, ensure the search bar is set to ‘Flights.’
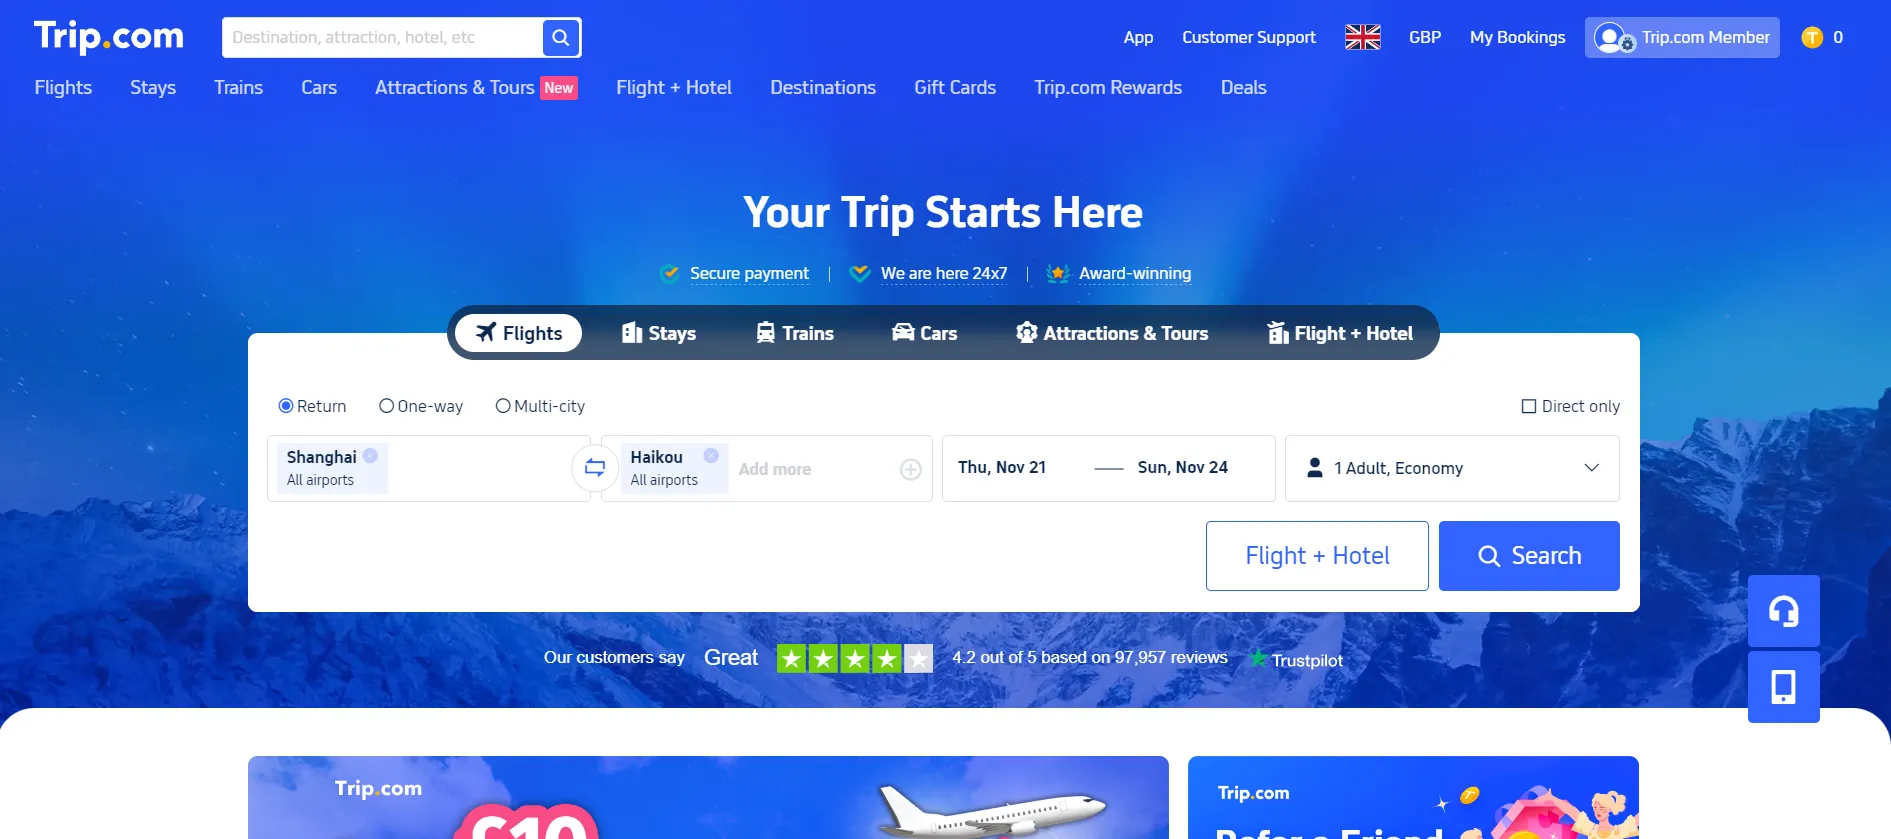
4. Choose whether you want a Return, One-way or Multi-city flight (which you can read our guide on here if you're not sure what this means!)
5. Search for and click on your departing and arrival cities. Note that you can select both specific airports or wider areas, which will have a note by them saying ‘All airports’ indicating a range of options.
6. Set your dates of departure and arrival using the calendar.
7. Choose how many passengers will be flying and what age range they fall under.
8. On the same tab, select what ticket type you are searching for: Economy, Business, First class, or either (which is categorised under Business/First).
9. Hit Search!
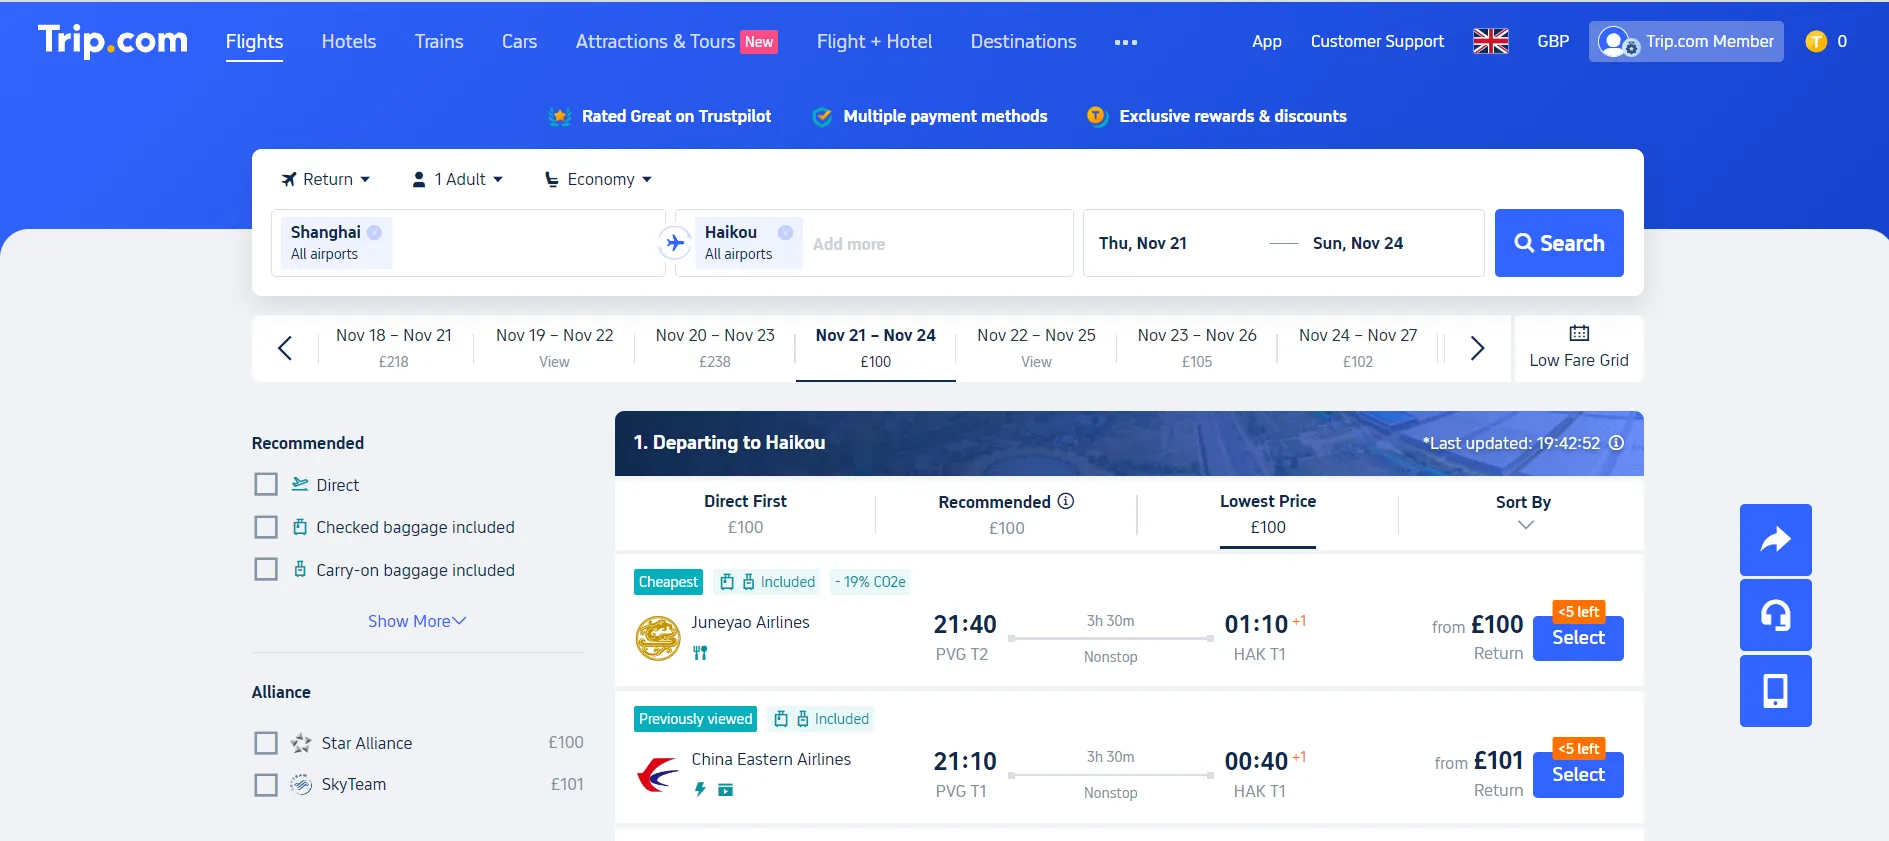
10. You’ll be presented with a list of options which fall under your specific date range. Notice that, above this list, other days for various prices are also displayed, which may help show you that alternative dates are available and could be potentially cheaper. For those looking for bargains, keeping an open mind on flexible dates is a key way of saving. Find out more here.
11. You can now browse this list for your options, but you can continue to filter your options to refine the list further, including filters such as whether checked or carry-on baggage is included, alliance, airlines, departure and arrival times, and more.
12. You can sort these options in various ways, such as flight duration, earliest or latest departures, and earliest or latest arrivals.
13. Select your ideal departing flight and then your arriving flight.
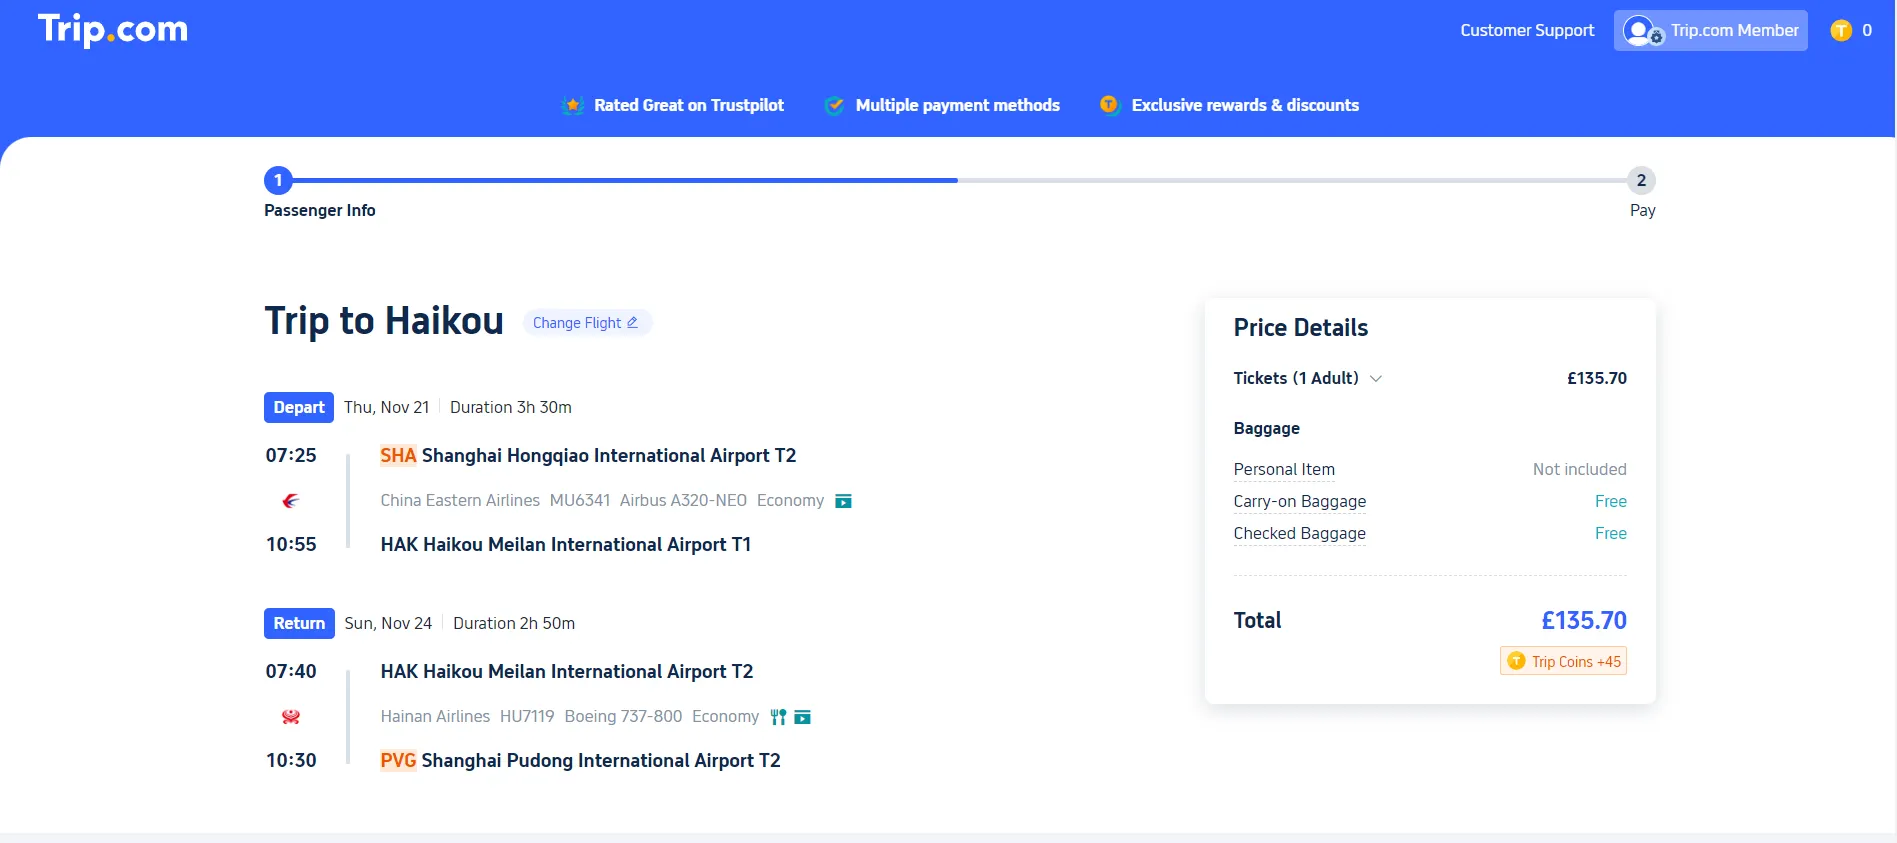
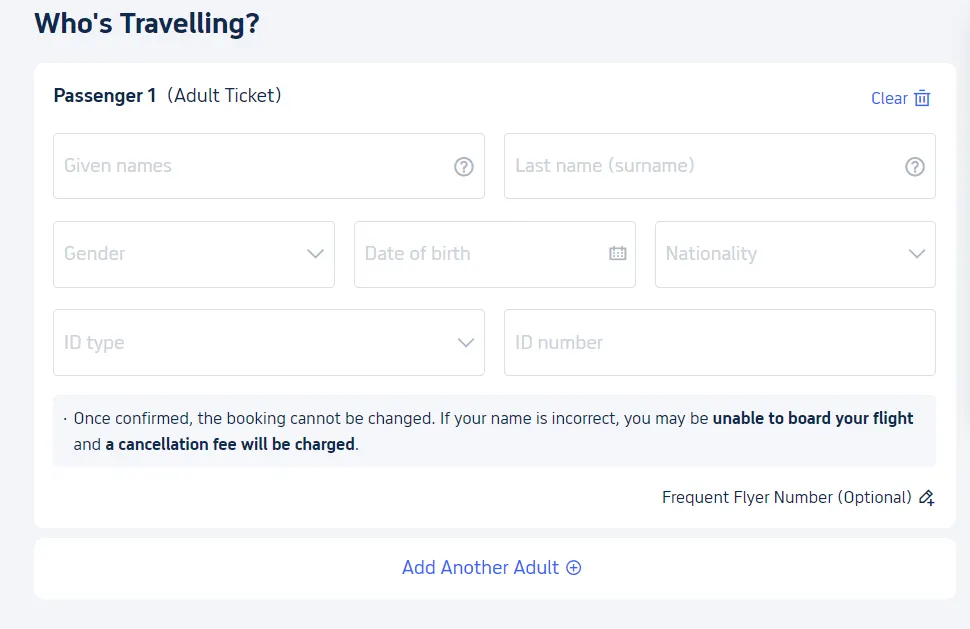
14. Be ready to enter your passenger details (names, gender, date of birth, nationality, ID type, ID number etc.), and contact details (email and password) and continue to the next page.
15. You can also add or remove baggage options at this stage. Be sure to double-check how much you’ll be taking with you on this journey.
16. There should be an option to add Travel Insurance, which is an important means of protecting yourself when travelling which should be considered. This isn't always available.
17. Don’t miss out on the notification letting you know how many Trip Coins you’ll be receiving when taking this journey! These can be cashed in at a later date for free or discounted travel, so it’s worth making a note of!
18. You should then have the option to select your seat in advance, meaning you get a first shot at window seats or extra legroom, although this is not necessary to complete at this stage.
19. Enter your payment details and click Checkout. Be sure to double check all of your details before booking!
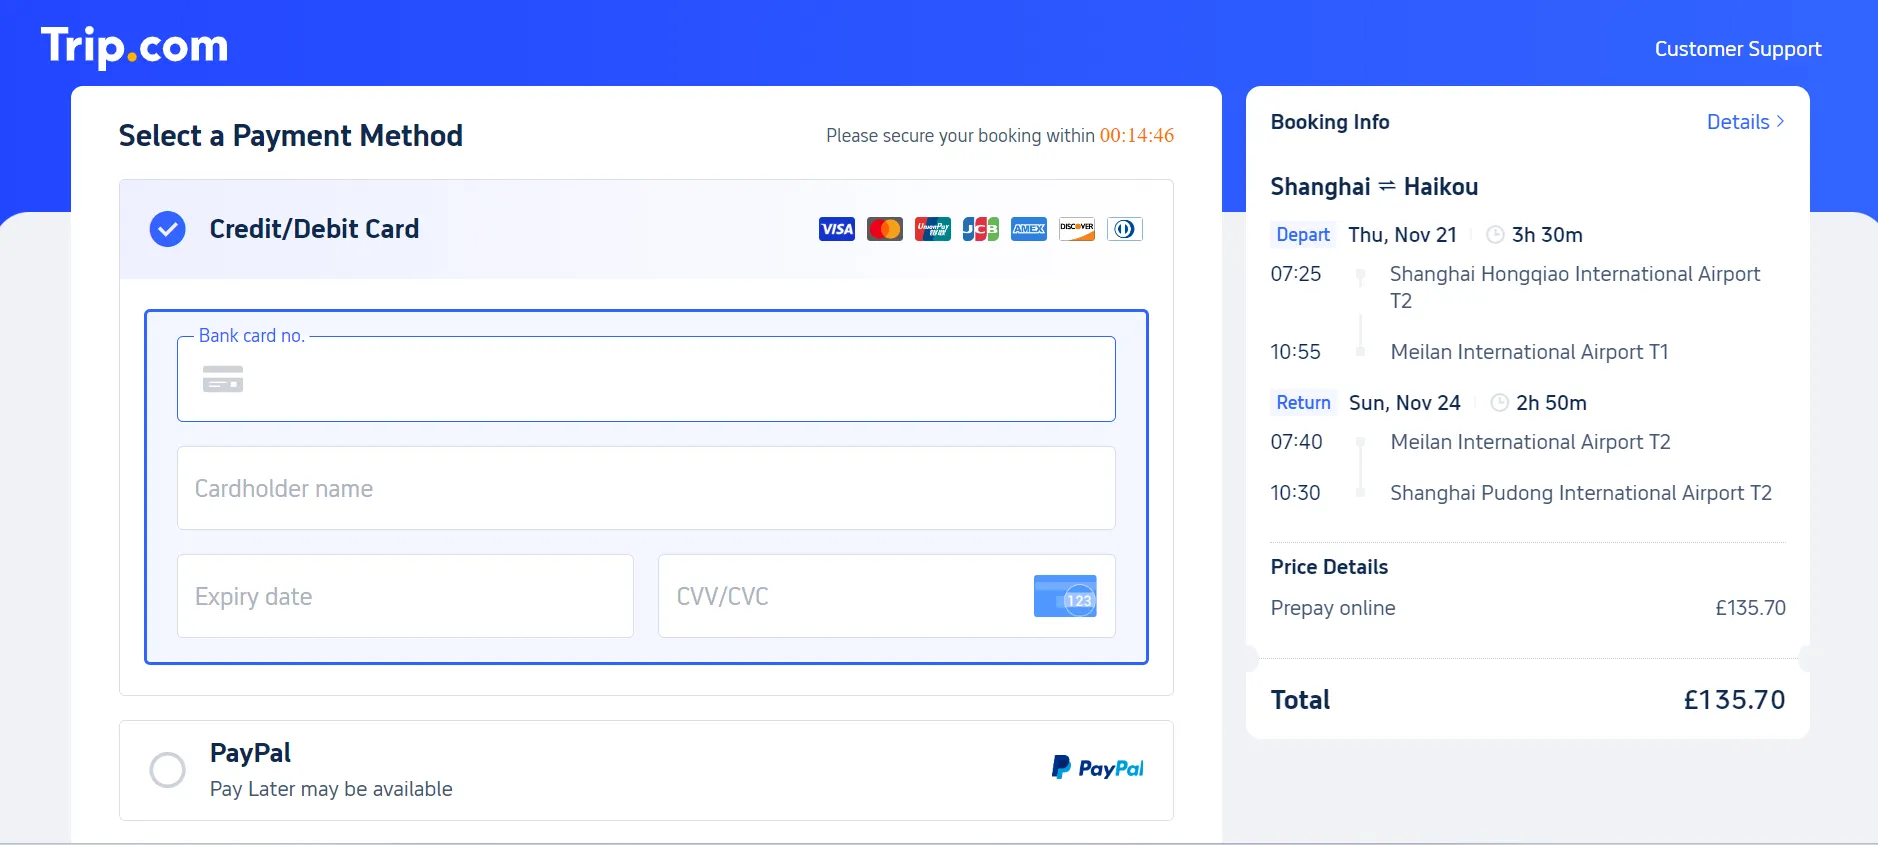
20. Be sure to check for confirmation messages to ensure your booking went through successfully!
How to Book Flights on the Trip.com App
1. Firstly, ensure you have the Trip.com app downloaded, which you can do here, or by searching for ‘Trip.com’ on the App Store or Google Play Store.
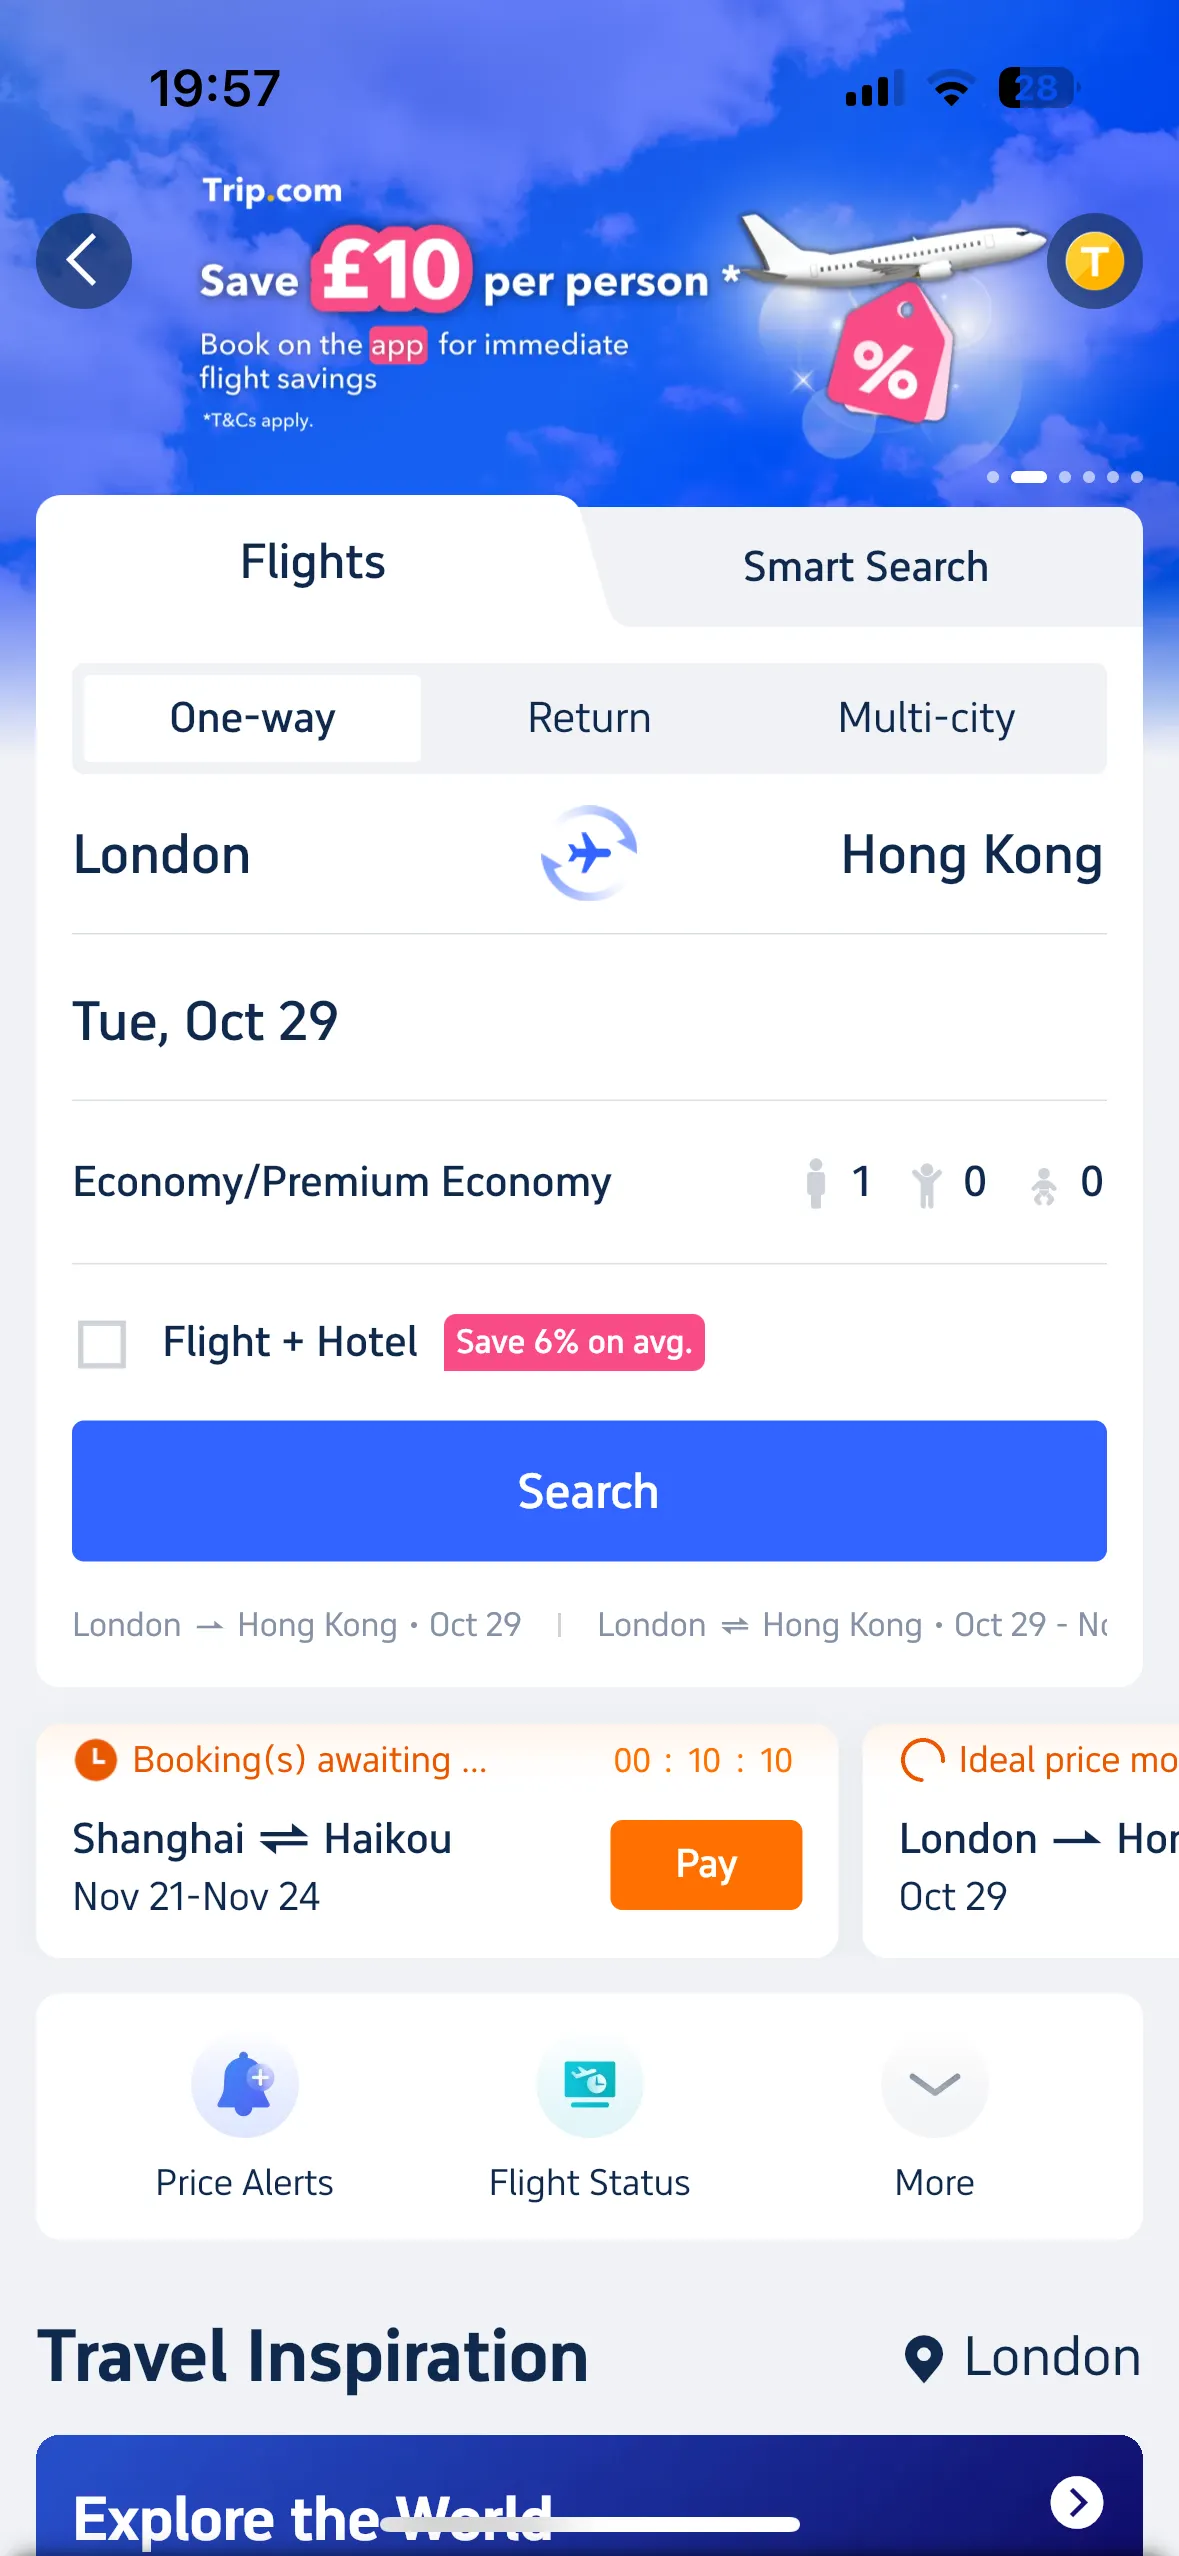
2. Open the app and tap on the ‘Flights’ button on the Homepage.
3. Choose whether you want a Return, One-way or Multi-city flight.
4. Search for and tap on your departing and arrival cities. Note that you can select both specific airports or wider areas, which will have a note by them saying ‘All airports’ to indicate a range of options.
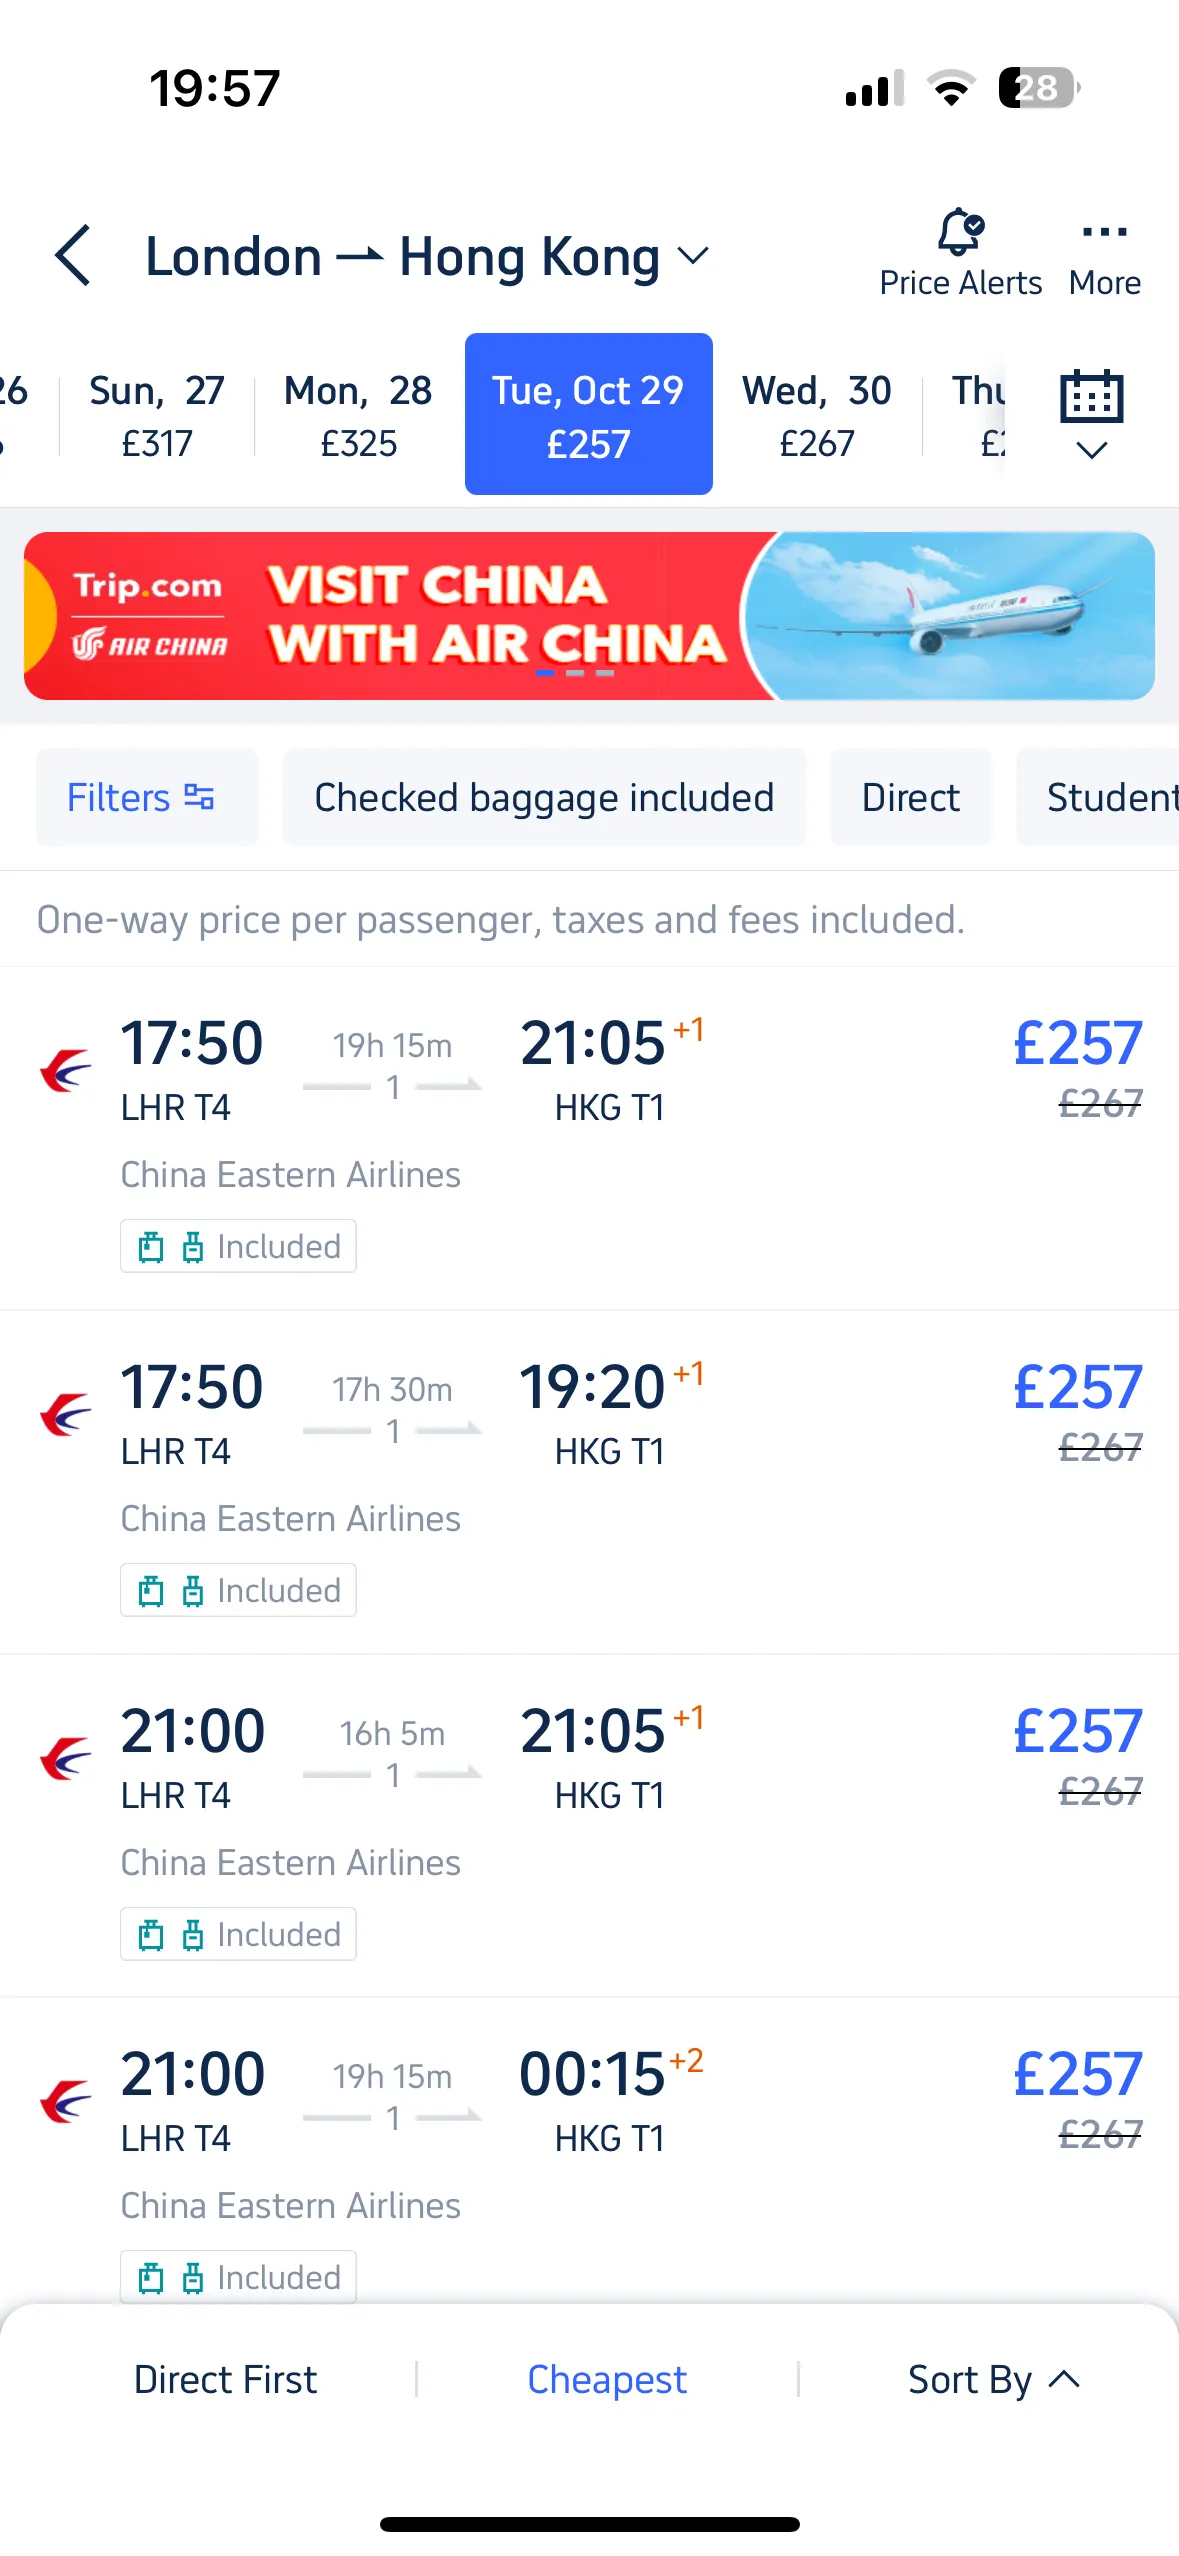
5. You can sort these options in various ways, such as flight duration, earliest or latest departures, and earliest or latest arrivals.
6. Select your ideal departing flight and then your arriving flight.
7. Choose how many passengers will be flying and what age range they fall under.
8. Set your dates of departure and arrival using the calendar.
9. Select what ticket type you are searching for: Economy, Business, First class, or either (which is categorised under Business/First).
10. Tap Search!
11. You’ll be presented with a list of options which fall under your specific date range. Notice that, above this list, other days for various prices are also displayed, which may help show you that alternative dates are available and could be potentially cheaper. For those looking for bargains, keeping an open mind on flexible dates is a key way of saving.
12. Be ready to enter your passenger details (names, gender, date of birth, nationality, ID type, ID number etc.), and Contact Details (email and password) and continue to the next page.
13. You can also add or remove baggage options at this stage. Be sure to double-check how much you’ll be taking with you on this journey.
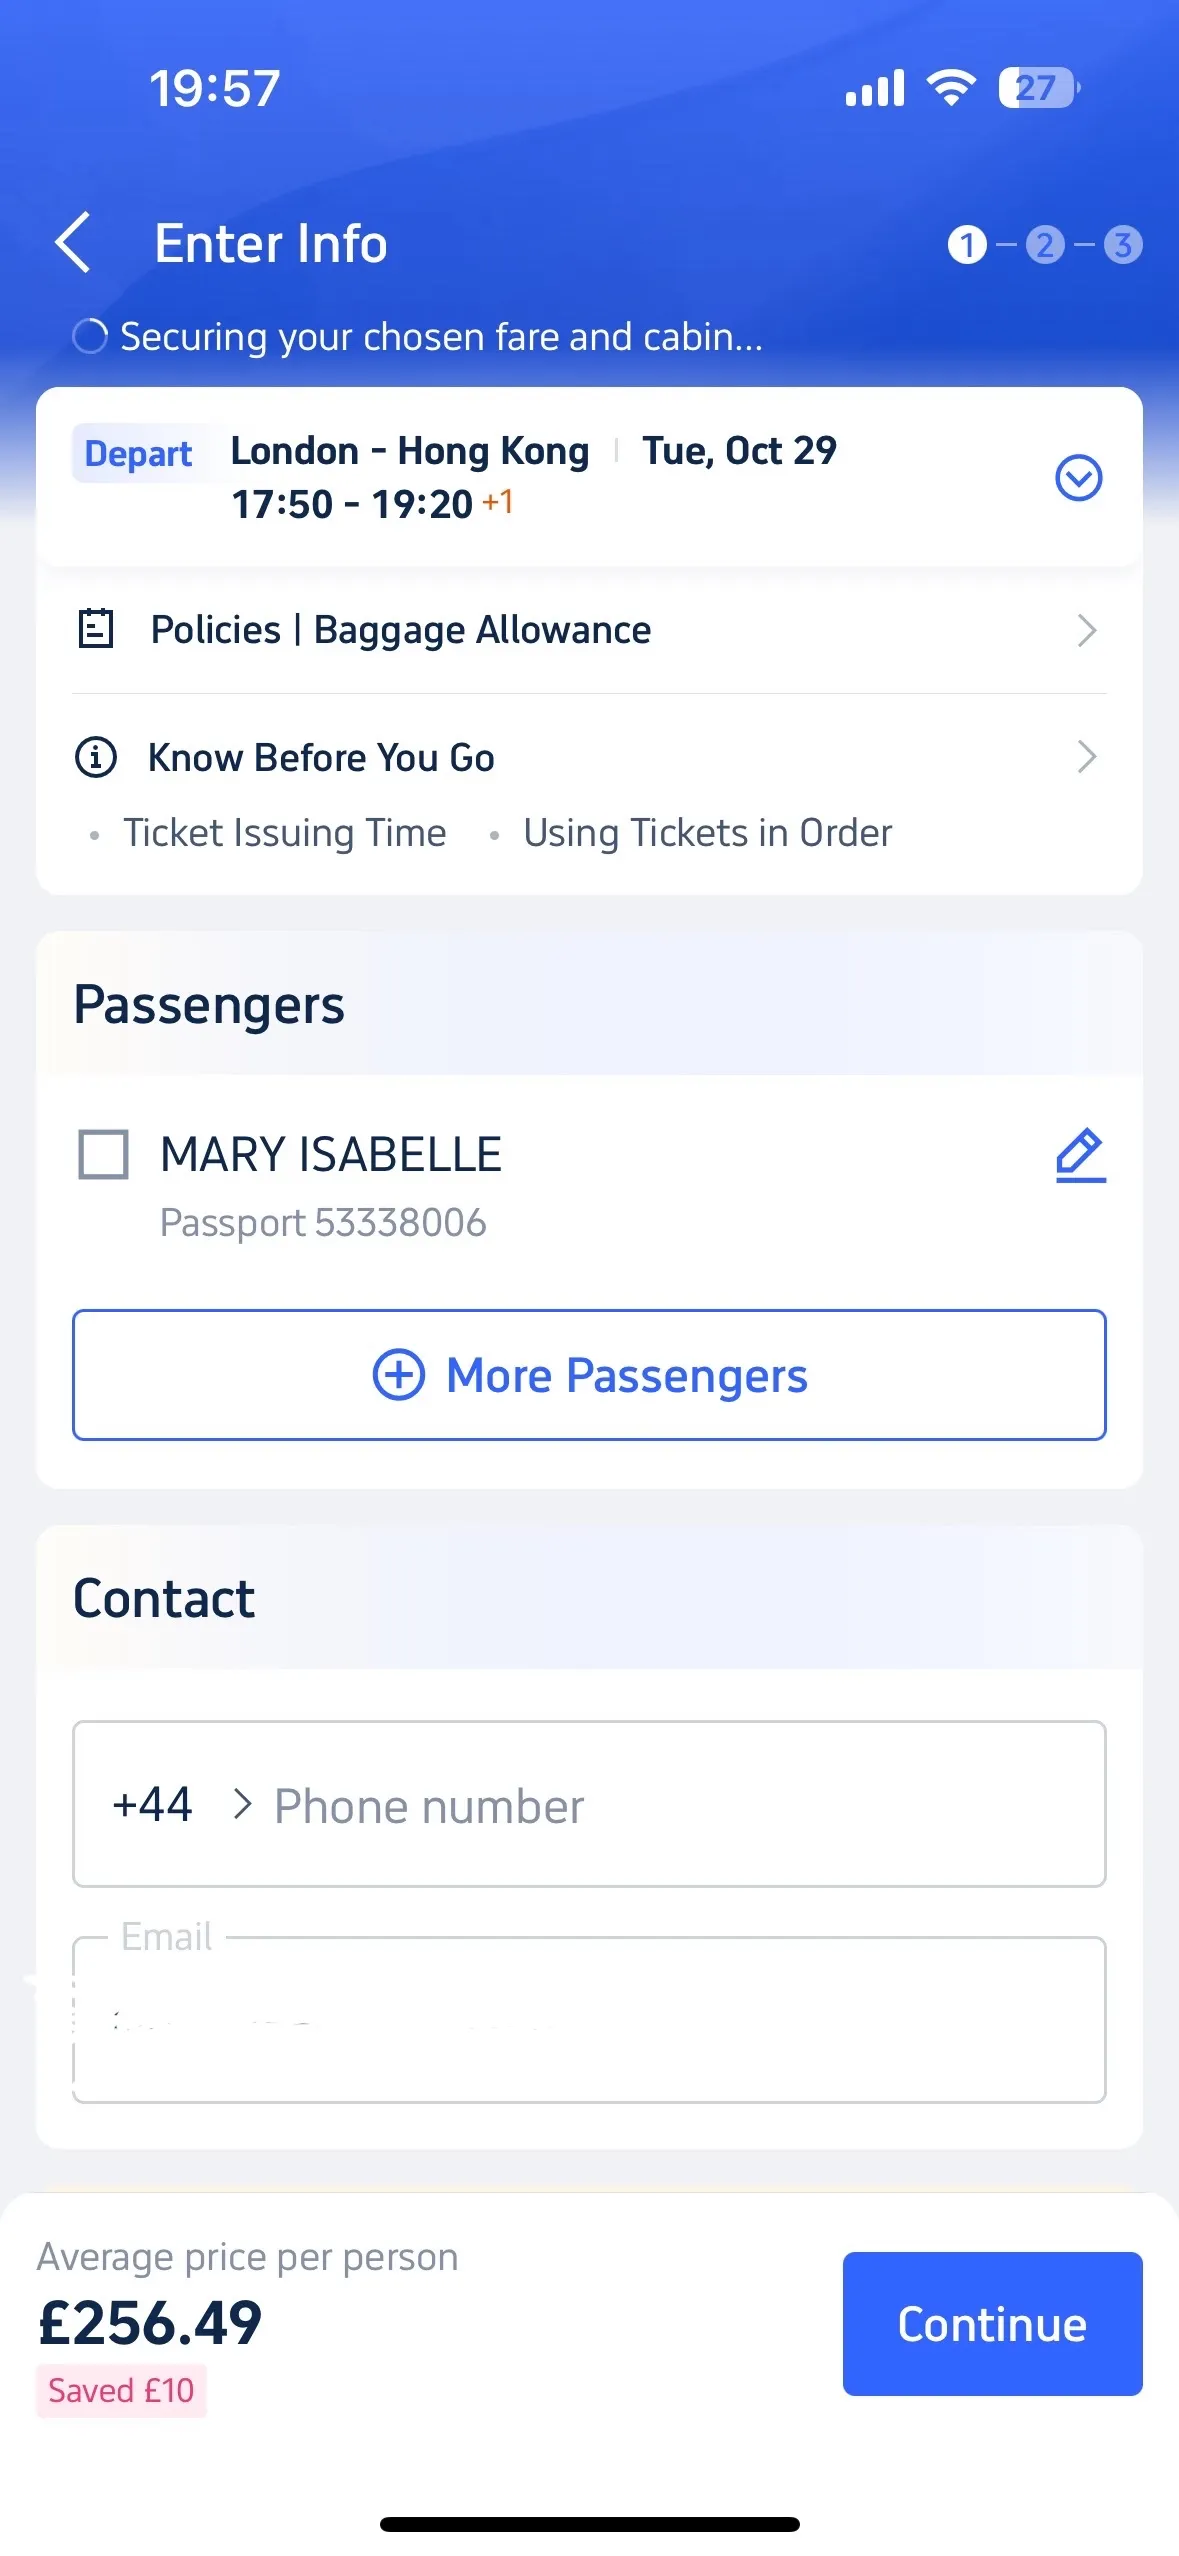
14. There should be an option to add Travel Insurance, which is an important means of protecting yourself when travelling which should be considered.
15. Don’t forget to take note of how many Trip Coins you’ll be receiving when taking this journey! These can be cashed in at a later date for free or discounted travel, so it’s worth making a note of!
16. You’ll should also have the option to select your seat in advance, meaning you get a first shot at window seats or extra legroom, although this is not necessary to complete at this stage.
17. Enter your payment details and click Checkout. Be sure to double check all of your details before booking!
18. Be sure to check for confirmation messages to ensure your booking went through successfully!
Now that you've got the hang of booking flights, you can check out our ten top tips for booking the cheapest tickets here.